After your EC2 Linux instance is launched, you can now connect to the very instance, execute commands, install software packages and services, and transfer files between your local computer and your instance.
Following are the connection options you can opt for if your local computer operating system is Windows.
- Putty
- SSH Client
- AWS Systems Manager Session Manager
- Windows Subsystem for Linux
This document will show you an in-depth and step-by-step process to connect to your EC2 Linux instance using Putty and SSH Client.
Option 1: Connect to your Linux instance from Windows using Putty
The following instructions explain how to connect to your instance using Putty, a free SSH client for Windows.
1. Install Putty and PuTTYgen on your local computer. Click on the following link: chiark.greenend.org.uk/~sgtatham/putty/late..


We will use PuTTY to get connected to our Linux instance, while PuTTYgen will be used toconvert the .pem key to .ppk format.
2. Convert your private key using PuTTYgen: PuTTY does not natively support the private key format for SSH keys. PuTTY provides a tool named PuTTYgen, which converts keys to the required format for PuTTY. You must convert your private key (.pem file) into this format (.ppk file) as follows in order to connect to your instance using PuTTY.
A. Open PuTTYgen (PuTTY Key Generator) and click Load.

B. On Load Private Key window, make sure that you choose All Files (.) so that .pem keys also show up.
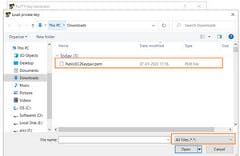
C. Search for the private (.pem) key and click Open.
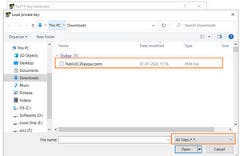
D. Press OK on this PuTTYgen Notice window.

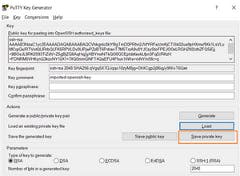
E. This will eventually load the contents of the private (.pem) key. Click Save private key to save this key into .ppk format.
F. Press Yes on the PuTTYgen Warning window as we will be saving this key without a passphrase to protect it.
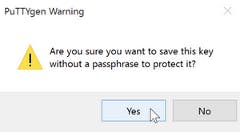
Note: A passphrase on a private key is an extra layer of protection. Even if your private key is discovered, it can't be used without the passphrase. The downside to using a passphrase is that it makes automation harder because human intervention is needed to log on to an instance, or to copy files to an instance.
G. Assign a name to this .ppk key and click Save to save this very key on to your preferred location on your Windows local machine.
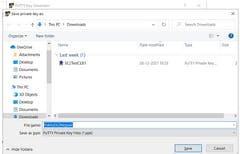
3. Connect to your Instance using PuTTY: Use the following procedure to connect to your Linux instance using PuTTY. A. Start PuTTY B. In the Category pane, choose Session and complete the following fields:
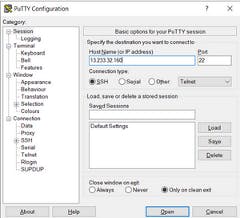
- In the Host Name box, mention either the Public IP address or the Public IPv4 DNS name of the linux instance.
- To fetch this information, select the instance, go to Details and from here you can copy either the Public IP address or the Public IPv4 DNS name of this very instance.
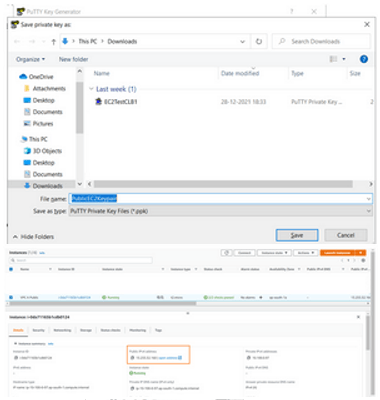
- Ensure that the Port value is 22. --> Under Connection type, select SSH.
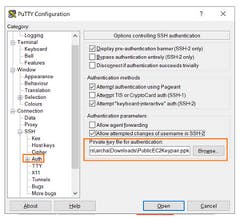
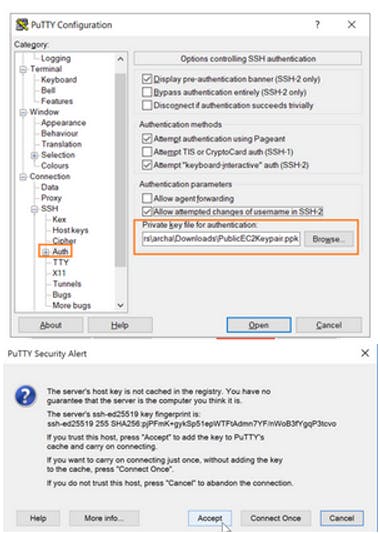
In the Category pane, expand Connection, expand SSH, and then choose Auth. Complete the following:
- Choose Browse --> Select the .ppk file that you generated for your key pair and choose Open
- If this is the first time you have connected to this instance, PuTTY displays a security alert dialog box that asks whether you trust the host to which you are connecting. Choose Yes or Accept. A window opens and you get connected to your instance.
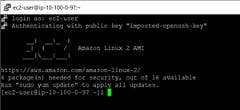
- Once connected, type-in the username (default username for Amazon Linux instance is ‘ec2-user’ and for Ubuntu instance is ‘ubuntu’).

- Press Enter so that you’re being authenticated and get shell access to your EC2 linux instance. From here you can start executing the linux based commands.
Option 2: Connect to your Linux instance from Windows using an SSH client (OpenSSH)
Alternatively, you can use an SSH client on your local computer to connect to your EC2 linux instances launched in AWS cloud. Your local computer might have an SSH client installed by default. You can verify this by typing ssh at the command line. If your computer doesn't recognize the command, you can install an SSH client.

You can very well install OpenSSH on your local computer. OpenSSH is the open-source version of the Secure Shell (SSH) tools used by administrators of Linux and other non-Windows for cross-platform management of remote systems. OpenSSH has been added to Windows (as of autumn 2018), and is included in Windows 10 and Windows Server 2019.
Click on the following URL to access the article that shows you step-by-step process to install OpenSSH on your Windows local machine: https://docs.microsoft.com/en-us/windows-server/administration/openssh/openssh_install_firstuse
- To connect using OpenSSH, open PowerShell.

- Run the following command. You can also mention either the Public IPv4 or Public IPv6 address (whichever is available) instead of the Public DNS name. ssh -i /path/my-key-pair.pem my-instance-user-name@my-instance-public-dns-name

